When it comes to buying a digital asset or a social media account, it is essential not only to ensure a smooth and secure payment method, but it is also important to have effective support to help you in different steps.
Actually, there are two common payment methods in Sebuda that buyers can use: the new cryptocurrency method and traditional bank transfer.
The best benefit of using Sebuda’s native cryptocurrency is that buyers can take advantage of a fast, seamless, and secure transfer experience due to minimal confirmation time and minimum transaction delays.
On the other hand, the bank payment option is ideal for those who desire to ensure the reliability of conventional payment methods as a result of safety and transparency via the banking system.
Both methods are known as flexible and comfortable approaches to protect your funds. Whether you’re a professional in crypto or are interested in traditional banking methods, SeBuda makes acquiring accounts and assets effortless, secure, and efficient.
Why Choosing the Right Payment Method Matters?
The right payment method is not about sticking to just a particular payment method; it is all about your convenience, preference, and familiarity with each method. Most of the beginners might find it difficult to choose cryptocurrency as a new way of payment. So, they go on with the banking method.
The thing that is important to note is that the payment method you choose can indirectly impact the security and speed of your payment.
If you are looking for a speed option, you can benefit from cryptocurrency, as it is instant and quick to pay. However, bank payments might not be as fast as cryptocurrency payments, as it takes longer to process, especially across the board.
Keep in mind that online transactions sometimes carry some risk, so using a trusted method ensures your funds are protected from mistakes or fraud.
Paying with SeBuda Cryptocurrency
Here, we provide a step-by-step guide to help you pay via cryptocurrency when buying a social media account or digital assets.
- Sign up/log in to Sebuda.com using your Gmail or ID and password.
- Choose the social media platform/ digital asset you prefer to buy.
- Analyze the insight of the account/ asset and the price.
- After making a deal and negotiating with the seller
- Click on “Buy with Escrow“
- Checkmark “I Agree to the Rules for Buyer” (Note: Remember to read the Rules for Buyers and then proceed with the payment step.)
- Click on “Start Escrow“
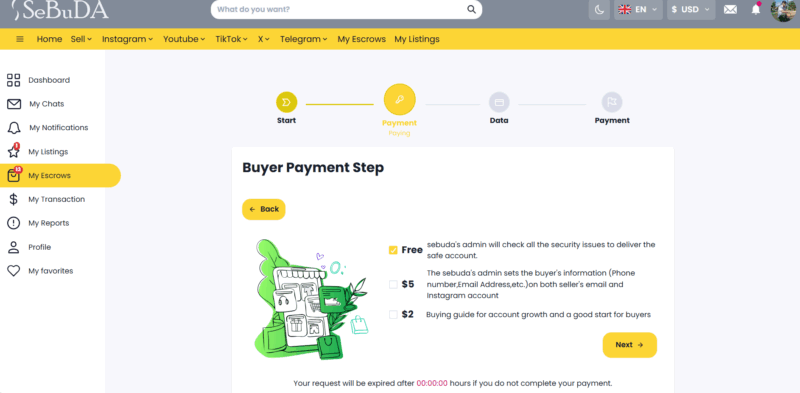
- In the Buyer Payment Step page, you should click on Next. (Note: Your request will expire after60:35:27hours if you do not complete your payment. If you want to quit the escrow, click on “Cancel Request Now.”
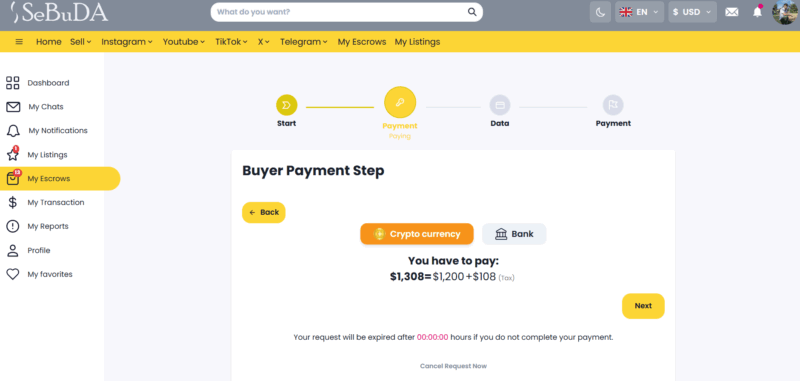
9. In the next step, you have to choose a payment method: Crypto or Bank.
10. If you choose crypto, the tax would be 9 percent.
11. Click on Next.
12. Now, you should choose the token standard (it depends on the wallet compatibility, which acts as the language your digital money speaks, which needs to match the blockchain ecosystem you’re using).

13.In this step, pay your USDC to this wallet address in the ERC20/ SOLANA/ BASE blockchain.
14. After completing your payment, enter your transaction ID (TXID) below, Transaction hash. (A Transaction ID (TXID) is like a receipt number for a cryptocurrency transaction.)
15.Finally, click on Submit Transaction hash (TXID). Use the Transaction hash, transaction ID, or TxID for moving forward with your escrow.
Remember, the process is the same whether you’re using the mobile app or the desktop platform. First, select the ‘Buy’ option to purchase your cryptocurrency. Then, go to the ‘Withdraw’ option and send the funds to your SeBuda wallet address.
Paying via Bank Transfer
Now, let’s go through paying via the bank transfer system. After covering the past steps, before choosing the payment method, you need to move forward with the following steps.
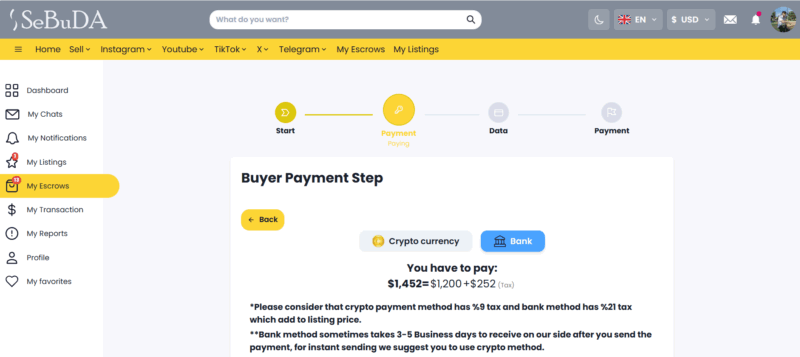
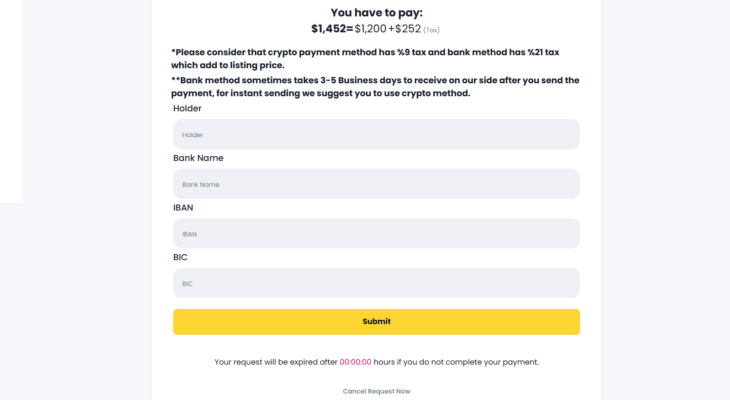
- If you choose Bank, the tax is 21 percent. (Bank payments can take 3–5 business days to reach us. For faster transactions, we recommend using the crypto method.)
- Now, put in the bank details, including holder, bank name, IBAN, and BIC.
- Holder: The person or organization that owns the bank account.
- Bank Name: The name of the bank where the account is held. E.g., Bank of America
- IBAN: International Bank Account Number
- BIC: Bank Identifier Code or SWIFT Code. In fact, it is a unique code that identifies your bank Eg, BUKBGB22
- Click on Submit.
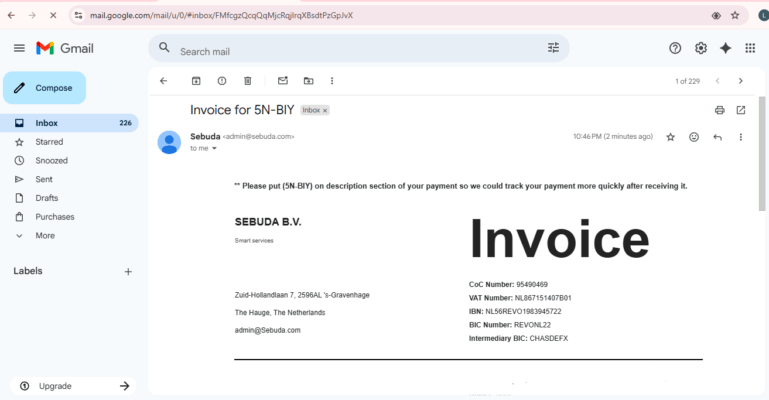
- Now, you will get an email from Sebuda,
5.
Comparing the Two Methods
In this section, we want to compare paying via bank transfer and crypto methods to have a clear idea of choosing the right method that best suits your requirements.
Speed:
- Crypto Payments are processed instantly, allowing you to receive funds or complete transactions quickly.
- Bank Transfers can take a few business days for the funds to reach the recipient, depending on the bank and region.
Security:
- Crypto Payments offer strong encryption and decentralization, but transactions are irreversible, so it’s important to double-check wallet details before sending.
- Bank Transfers are highly secure due to the involvement of financial institutions, but they can be subject to fraud risks if not handled carefully.
Convenience:
- Crypto is ideal for users who are comfortable with digital currencies and prefer low fees and quick transfers.
- Bank Transfers are widely accepted and trusted, but the processing time can be a hassle for urgent transactions.
Final Tips for Smooth Payment in Sebuda
To ensure a smooth and hassle-free transaction, it’s essential to double-check all transaction details before confirming your payment. This includes verifying the amount, wallet addresses, and selecting the correct network or blockchain.
Keep records of your payment for future reference, such as transaction IDs and confirmation receipts, in case you need to track or verify the transfer later.
If you encounter any issues or uncertainties during the payment process, don’t hesitate to contact SeBuda support for assistance. Our team is here to help resolve any issues quickly and efficiently, ensuring a seamless experience from start to finish.
Coinbase Tutorial for US/UK Users
Step 1: Sign Up
1. Create your Coinbase account. It’s quick and easy—if you want extra guidance, check out the How-to-sign-up-on-Coinbase video, but honestly, you’ll manage without it!
Step 2: Buy the Cryptocurrency
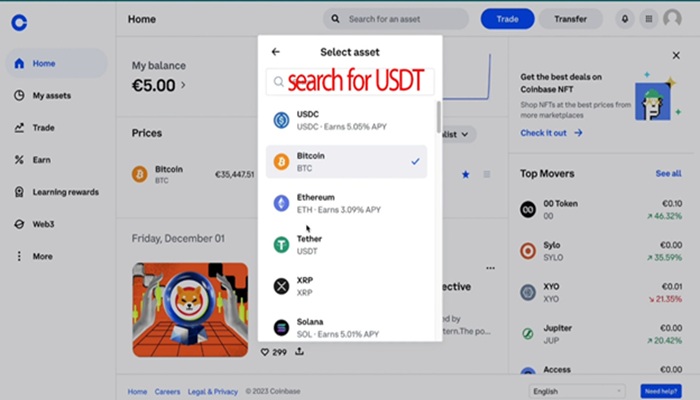
You need to buy the amount you want to send. Typically, USDT (Tether) is used.
Here’s how:
- Click the Trade
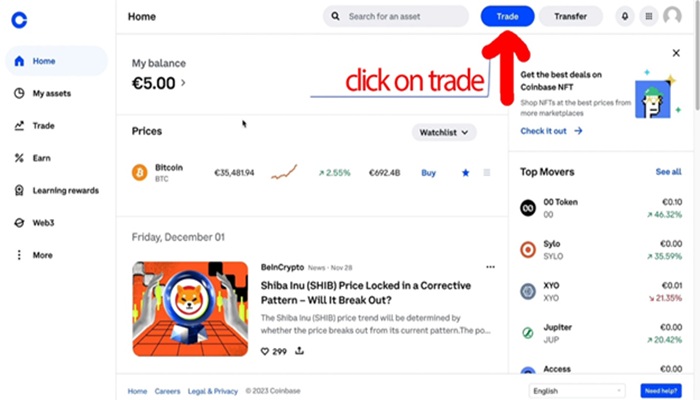
2. Select Buy.
3. Enter the amount you want to purchase.
⚠️ Don’t forget to add a little extra for the network fee. For example, on the Tron network, the fee is around $1.50. So, if your purchase is $100, buy $101.50.

Step 3: Send to Your SeBuda Wallet
Once the funds appear in your wallet, it’s time to transfer them to your SeBuda wallet: here is the tutorial: Send-payment-to-sebuda
- Go to Assets and select the coin you purchased (USDT or Tether).
- Click Wallet, then Send.
- Enter the SeBuda wallet address from your escrow panel and proceed.
- Wait for the transaction to complete. Once successful, copy the Transaction ID (TXID) into your escrow panel.
That’s it! You’re done!
⚠️ Ensure you select the correct blockchain/network. Sending to the wrong one may cause permanent loss.
In some regions, USDT may not be available. If so, use USDC instead. If any issues arise, contact the admin for help.
Binance Tutorial for Non-American Users
Step 1: Sign Up
- First, sign up on Binance. It’s really easy! You can check out a video tutorial on click on How-to-sign-up-on-Binance if you’d like, but we’re sure you’ll manage without it!
Step 2: Buy USDT
- Once you’re signed up, you’ll need to buy the amount you want. Here’s how:
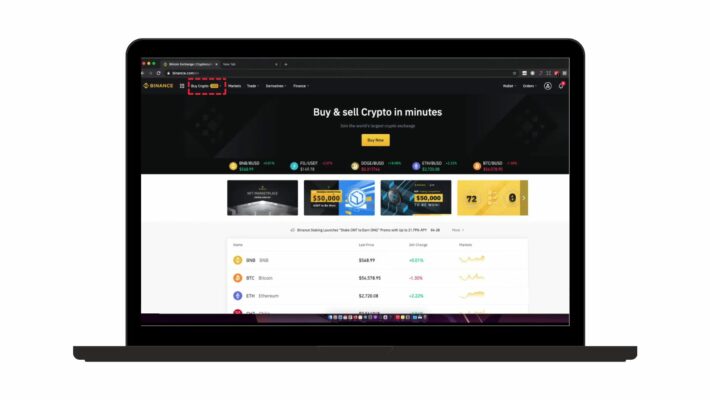
- Click on the “Buy Crypto” button on the Binance homepage.
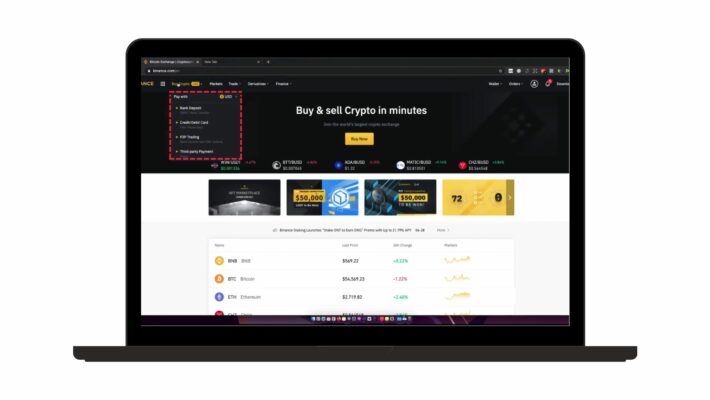
- Choose your payment method (bank transfer, credit card, etc.).
- Search for USDT (Tether) in the “Coin” section, then select it.
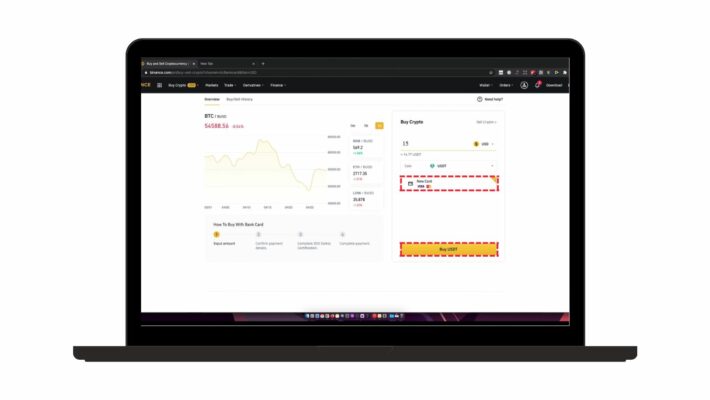
4. Enter the amount you want to buy. Don’t forget to add $1.50 extra to your escrow amount!
5.Click “Buy” and complete the purchase.
You can watch the video to know how-to-buy-USDT-on-Binance, also refer to the photo below for extra help!
Step 3: Send USDT to Sebuda Wallet
- Now that your USDT is in your Binance wallet, it’s time to send it to your Sebuda wallet.
Here’s how:
- Go to your Binance wallet and click on the “Spot” section.
- Click on “Withdraw” to send your USDT.
- Select USDT (Tether) from the options.
- Click on “Send via Crypto Network”.
- Copy the wallet address provided in your escrow panel and paste it into the address field on Binance.
- Choose the network: Make sure to select either TRC20 (Tron) or ERC20 (Ethereum) based on the wallet address you copied from Sebuda.
Important Note: Ensure that the amount you’re sending is exactly the escrow amount, not the withdrawal amount. Double-check the address and network before sending!
Binance tutorial [Non-American users]
1-You need to sign up first. For signing up, you can click on How-to-sign-up-on-Binance and watch the video, but it’s super easy, and we’re sure that you can handle it without watching it!
2-You need to buy the amount you want, how-to-buy-USDT-on-Binance
**You can learn through the photo below, too:
2_a: Click on the buy crypto button
2_b: choose your method for buying
2_c: on Coin section, search for USDT and choose it, then choose the method you want to use for purchase, enter the amount of your escrow+1.5 dollar extra, and click on buy
3: When the amount shows up on your wallet, it’s time to send it to Sebuda wallet address, Send-payment-to-sebuda
*Send it only to the wallet address that we give you on your escrow panel, and be careful with the network or blockchain.
3_a: choose Wallet, click on the spot section, then click on Withdraw
3_b: click on USDT [Tether]
3_c: click on send via crypto network
3_D: copy our wallet address from the escrow panel, then paste it in the address section on Binance, for Network choose TRC20 [Tron] or ERC20 [Ethereum] according to what you copied from Sebuda.
Remember that the received amount should be equal to the escrow amount, not the withdrawal amount.
Trust Wallet Tutorial (Backup Option)
In case Binance or Coinbase isn’t available in your region, Trust Wallet is a great alternative. Here’s how you can use it:
Step 1: Download Trust Wallet
First, download the Trust Wallet app from the Google Play Store. (how to buy USDT on Trust Wallet)
Step 2: Buy USDT on Trust Wallet
Once you have the app, you can buy USDT (Tether) with these simple steps:
- Open the app and click on “Add Token”.
- In the search bar, type USDT and add it to your wallet.
- Once USDT is added, click on “Buy” to purchase the amount you want.
- After buying, click on “Send” to send the USDT to our wallet address.
We hope that we make the process a little bit easier for you. Remember, if you face any problem, just contact our friendly support team.