Remember, securing your X account is only part of the job.You should also make sure your email is protected. Check out the article “How to Secure Your Email?” for practical tips.
For X accounts, the process is similar to TikTok, following a 7-day security schedule.
Usually, TikTok and X restrict new devices from setting or changing sensitive data for about 72 hours after login, to prevent unauthorized access.
You should instruct users as follows:
- First, secure your email immediately after gaining access.
- After 24 hours, change your account password on X.
- After 72 hours, update the phone number and email address linked to the X account.
This gradual process maintains the account’s stability and prevents triggering automatic security locks during the full transfer of ownership.
Step 1: Secure Your Email
Your email controls access to your X account, so start by strengthening it first.
Do this first:
- Sign in to your main email on a trusted device.
- Add or confirm your recovery phone number and backup email.
- Turn on Two-Factor Authentication (2FA) for your email — preferably through an authenticator app instead of SMS.
- Review recent sign-ins and log out of unfamiliar browsers or devices.
- Remove old app connections you no longer use.
- Take your time — up to four hours for this step is completely fine.
Step 2: Log In to X
- Once your email is secure, take a short break before logging in to X.
Tips:
- Use your usual, trusted device and a stable connection.
- Don’t rush to change passwords or enable 2FA yet; first, ensure you can access your account normally.
- Check that your X account’s email and phone number are correct in Settings → Your Account → Account Information.
- Avoid switching devices during this phase to keep your login history consistent.
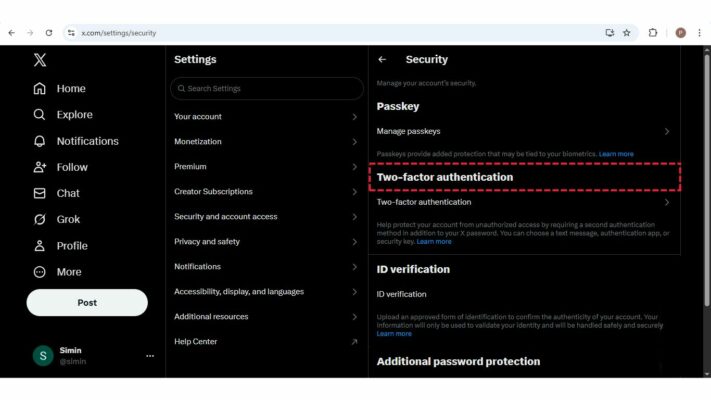
Step 3: Enable X Two-Factor Authentication
Now that your email is secure, it’s time to protect your X account itself.
How to do it:
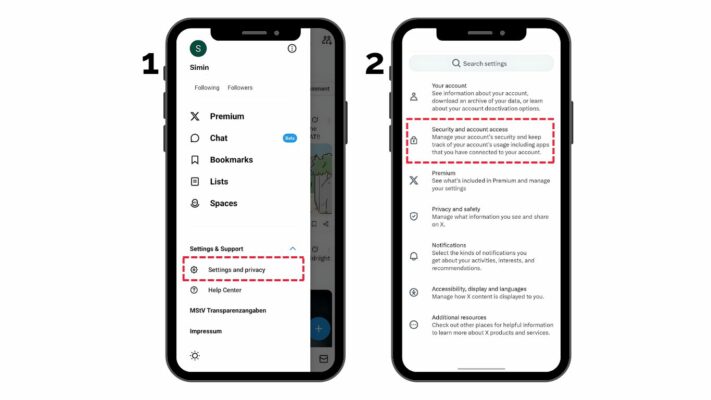
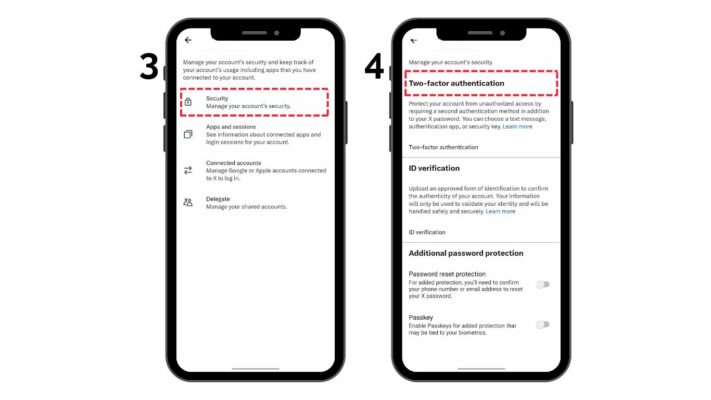
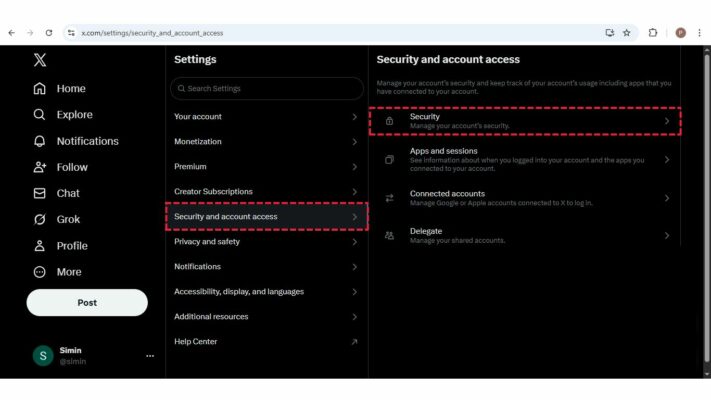
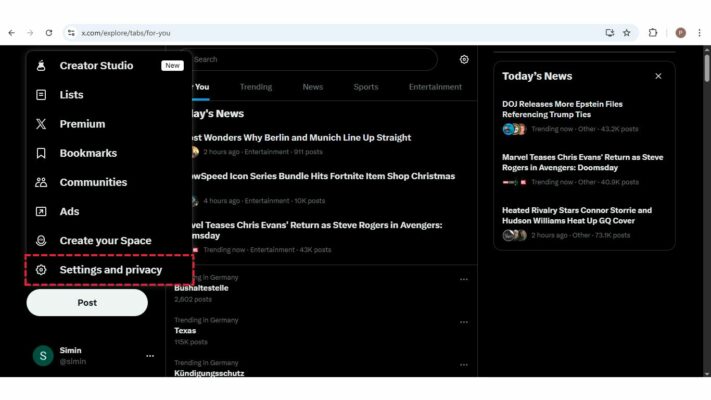
- Go to Settings and Privacy → Security and Account Access → Security → Two-Factor Authentication.
Desktop:

Choose your preferred method:
- Authentication App (Recommended) – generates secure one-time login codes.
- Text Message (SMS) – receive codes via your mobile number.
- Security Key – a physical device for professional use.
- Complete the setup and confirm it works.
- Save your backup codes somewhere safe (e.g., a password manager).
- Ensure only your trusted devices are connected to your account.
- Enabling 2FA dramatically reduces the risk of unauthorized access.
Step 4: Change Your Passwords
After several hours, refresh your login credentials for both email and X.
What to do:
- Create a strong, unique password for X — 12+ characters with letters, numbers, and symbols.
- Use a different password for your email.
- Never reuse old passwords on other platforms.
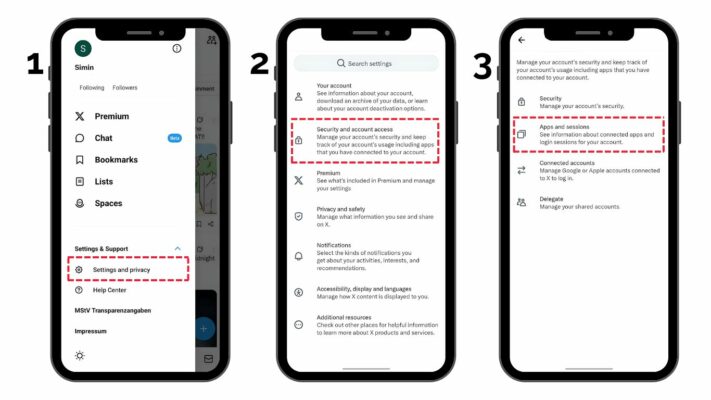
Review logged-in sessions:
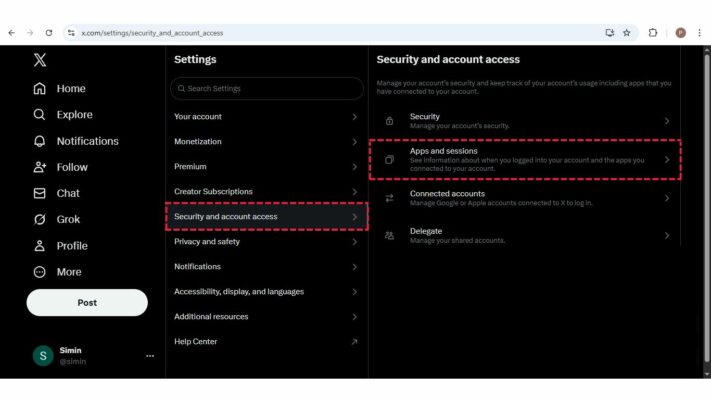
- X → Settings → Security → Apps and Sessions.
- Log out of devices you don’t recognize.
Desktop:
Step 5: Final Review and Long-Term Safety
- End the process by reviewing your security settings and confirming stability.
Final checklist:
- Check your email’s login history again — remove unknown devices.
- Open X → Settings → Security and Account Access → Apps and Sessions to review active logins.
- Ensure 2FA is still active on both your email and X.
- Verify your recovery options (email + phone).
- If you manage a business or verified account, enable identity verification for additional protection.
- Keep your backup codes and recovery details stored securely and privately.
⚡ Important Reminders
- You have up to 24 hours to complete all steps try to move slowly and carefully.
- Making too many changes at once, especially from a new device, can trigger security locks.
- Never share passwords, recovery codes, or 2FA tokens with anyone, even if they claim to be from “X Support.”
- Keep your operating system and X app/browser updated.
- Review your settings every few months for ongoing protection.
Note for Buyers:
If you purchased this X account from someone else, coordinate these steps while the seller is online. Some verification codes may still be sent to their old email or device, and you’ll need their help to receive those codes before you switch everything to your own contact information.